 |
| _______________________________________________________________________________________ |
| |
|
| |
| 1. Download User Photo through TCP/IP. |
| This TCMSv2.2 007 features available for users of FingerTec iKiosk 100 Plus only. |
| |
| Installation Setup |
| Download the new update from this link: http://www.fingertec.com/download/pang/FingerTec%20TCMS%20v2.2%20Setup.zip |
| |
| Download user photo through TCP/IP |
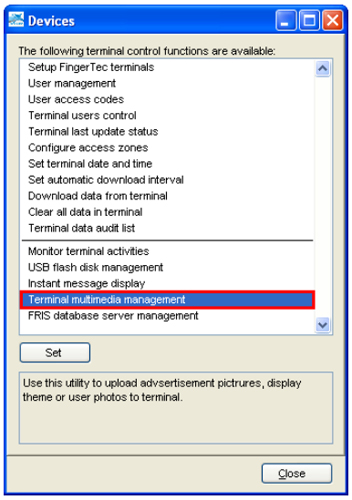
| Run your latest TCMSv2 and click on the Device icon. Choose Terminal multimedia management. |
 |
| |
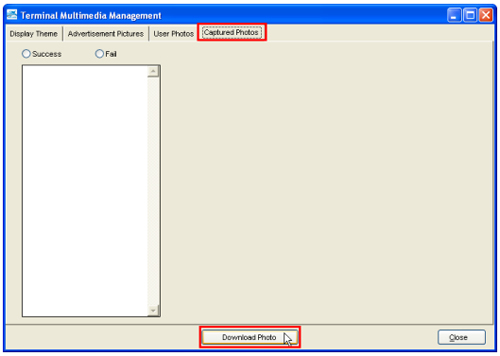
| In the Terminal Multimedia Management, click on Captured Photos and click Download Photo. |
 |
| |
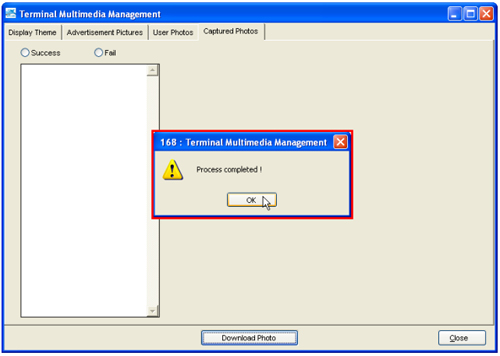
| A pop up will appear after the download process is finished. Click the OK button to proceed. |
 |
| |
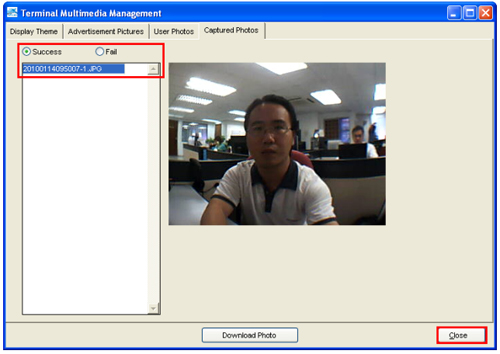
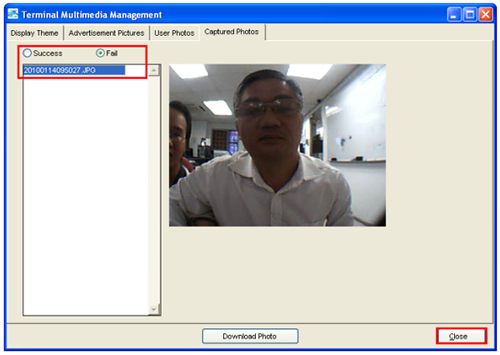
| Click on the Success button and choose the file that you want to view. See an example below. |
 |
| |
| Description of the number appears on the photo 20100114095007-1.JPG is explained below: |
Year |
Month |
Date |
HH:MM:SS |
User ID |
2010 |
01 |
14 |
09:50:07 |
1 |
|
| |
| Click the Close button after the process is complete. |
| |
| If the photo failed to be uploaded , the number will appear without the User ID, as you can see below. |
 |
| Note: Please manually delete the photo in the terminal after the download process. |
| |
| Latest Features of TCMS V2.2 006 |
| 1. |
Export Terminal ID from the Attendance Sheet. |
| 2. |
Create new section when import user id. |
| 3. |
Export attendance record to VFP table. |
| 4. |
Save user's fingerprint template as JPG using OFIS scanner. |
| 5. |
Post attendance to payroll. |
|
| |
| Step 1 |
| Export Terminal ID from the Attendance Sheet. |
| |
| Installation Setup |
| You can download the latest version of TCMSv2.2 006 features by clicking on the New Release icon on your software menu icon. |
 |
| |
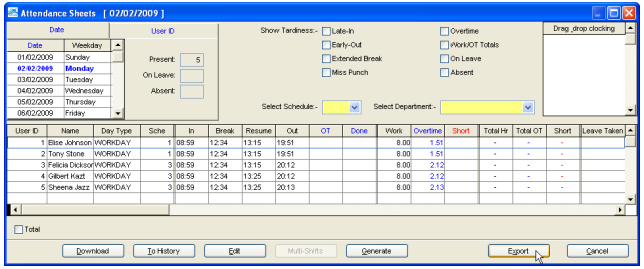
| Run your TCMSv2 software and click on the Attendance Sheet. |
 |
| |
| Click on the Export button. |
 |
| |
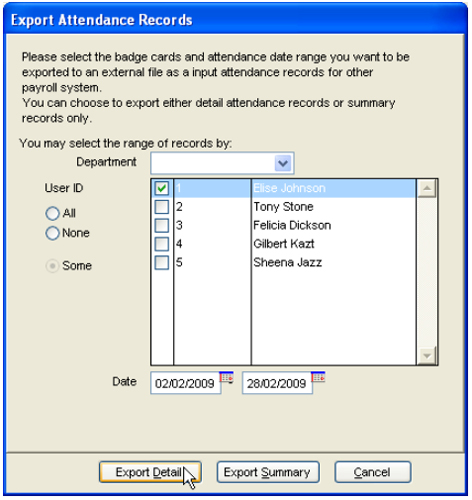
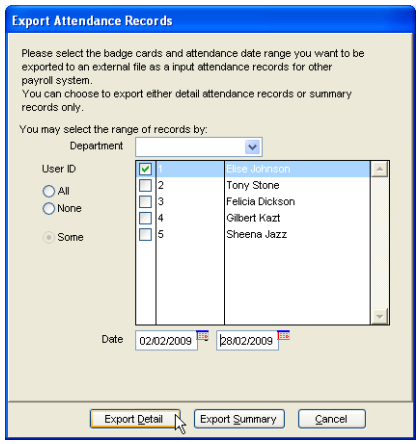
| Choose the User ID, Department and the date range and click on Export Details. |
 |
| |
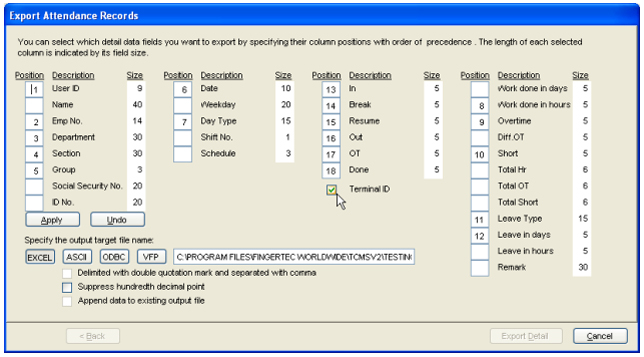
| In the Export Attendance Records click on Edit button, check on the Terminal ID and enter the Position for In, Break, Resume, OT, Out and Done. |
 |
| |
| Click Apply when you are done, choose EXCEL and enter the save location. And click on Export Detail. |
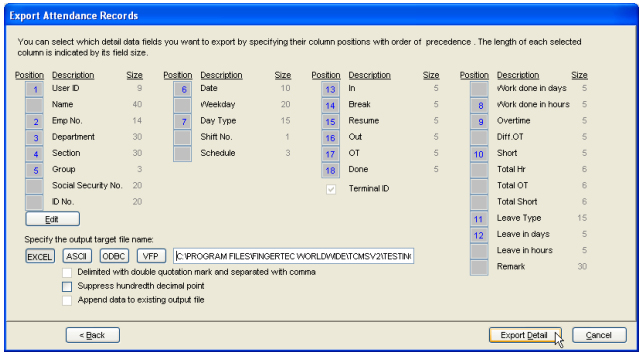 |
| |
| As you can see below the sample of the EXCEL format with Export Terminal ID in column M, O, Q and S. |
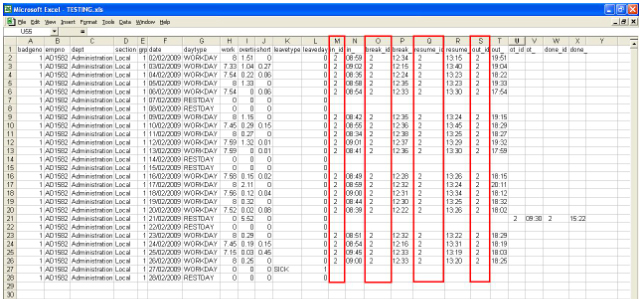 |
| |
| Step 2 |
| Create new section when import user id |
| |
| Click on the User icon on your TCMSv2 software. |
 |
| |
| On the User menu click on Import User button. |
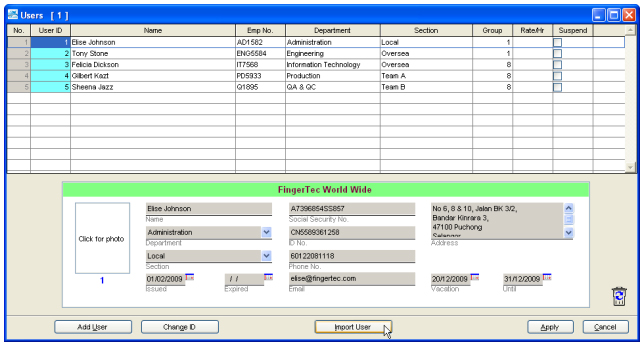 |
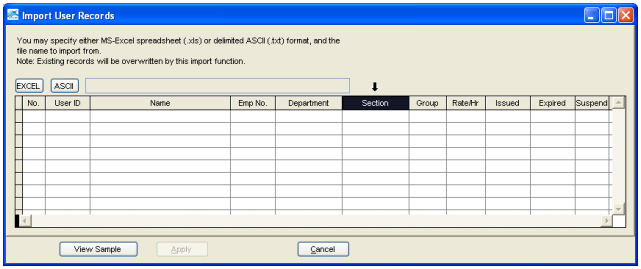
| |
| You can see the new Section column in the Import User Records menu below. |
 |
| |
| Step 3 |
| Export attendance record to VFP table. |
| |
| In your Attendance Sheet click on Export button. |
 |
| |
| Export Attendance Records menu will appear as you can see below. Choose the User ID, range date and click on Export Details. |
 |
| |
| Click on Edit button if you wan to change the details, enter the save location, and click on VFP. Click on Export Detail button to export. |
 |
| |
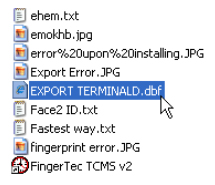
| You can see the export file on the TCMSv2 folder. (C:\Program Files\FingerTec Worldwide\TCMSv2) Below is the sample for the VFP. |
 |
| |
| Step 4 |
| Save users’ fingerprint template as JPG using OFIS scanner. |
| |
| How to save User fingerprint template in to JPEG format using OFIS scanner.Make sure your OFIS Scanner connected to the TCMSv2. |
 |
| |
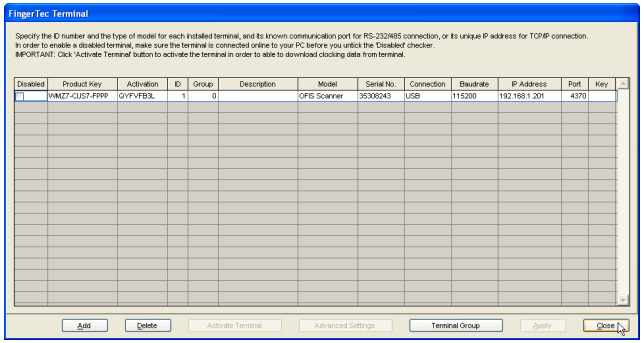
| Click on the Device icon in your TCMSv2 software menu. |
 |
| |
| Choose User Management and click on Set button. |
 |
| |
| In the User Management menu, click on Enroll button to enroll. |
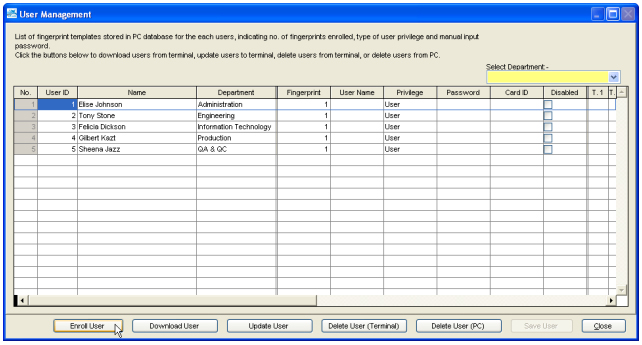 |
| |
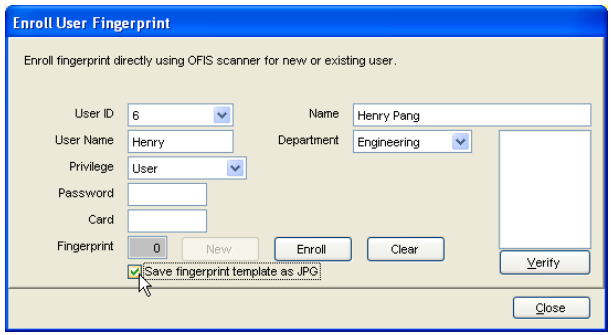
| Enroll User Fingerprint menu will appear, enter the details for the user and click on the “Save fingerprint template as JPG”. Now click on Enroll button and start the enrollment. |
 |
| |
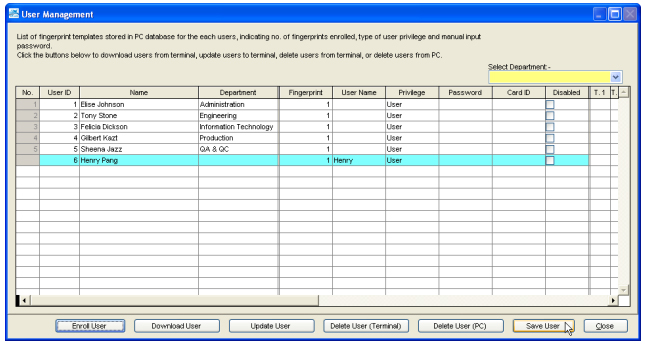
| When the enrollment is done, please click on the Save User button. |
 |
| |
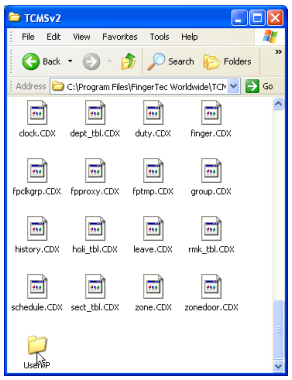
| To check the fingerprint template please go to your TCMSv2 folder, example below: |
 |
| |
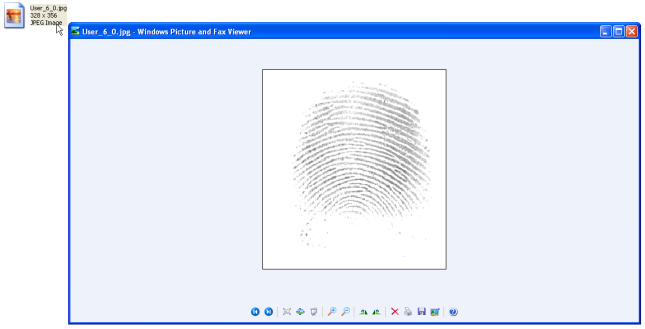
| Open the “User FP” folder and double click on the User_6_0.jpg to view the fingerprint template. See below. |
 |
| |
| Step 5 |
| Post attendance to payroll. |
| |
| First please open your TCMSv2 software folder and open config.ini. |
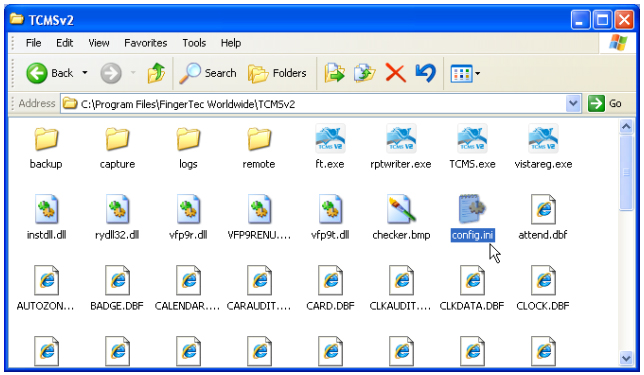 |
| |
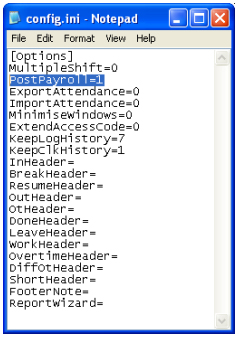
| In the config.ini file please edit the PostPayroll=0 to PostPayroll=1.Click Save to save the config.ini file and Run your TCMSv2 software. |
 |
| |
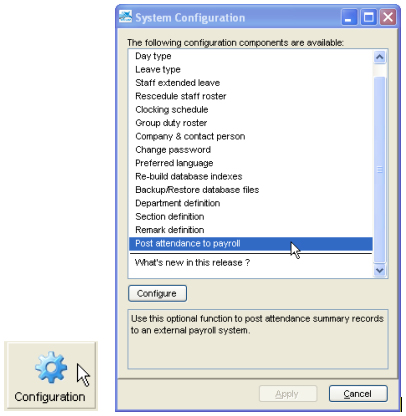
| In the TCMSv2 software, click on Configuration icon. And double click Post attendance to payroll. |
 |
| |
| A new Post To Payroll menu will appear. Enter the details and click Apply. |
 |
| |
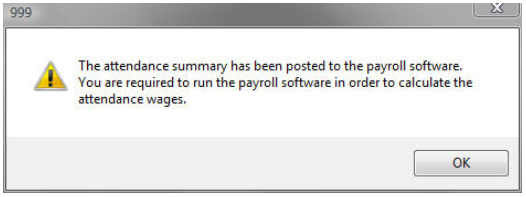
| This message will appear when the export Post To Payroll is done. |
 |
| |
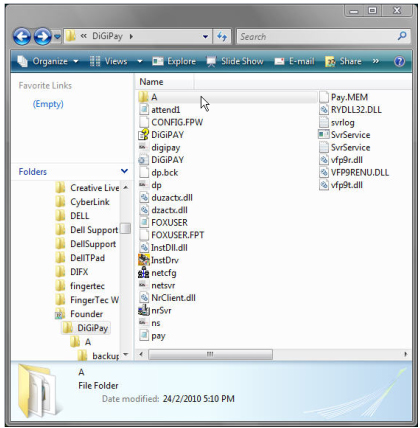
| Now go to the Payroll folder example “C:\Program Files\Founder\DiGiPay”And look over a folder name “A”. See below the example: |
 |
| |
| How to check your TCMSv2 software version? |
| |
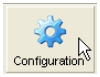
| Run your TCMSv2 software and click on the Configuration icon. |
 |
| |
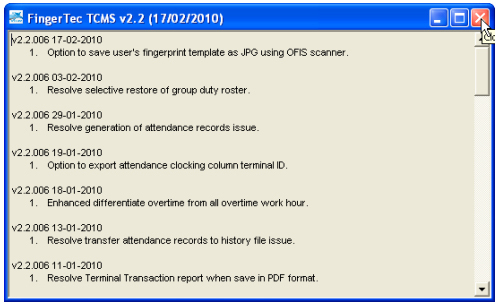
| Double click on “What’s new in this release? ” |
 |
| |
| A menu will appear showing the date, version and what’s new in the software. |
 |
| |
|
|