| Controlling user accessibilities among FingerTec Terminals |
| Previously, the accessibility of users was handled by accessing the User Management page in the TCMS V2. An administrator can upload or delete user information (user ID, faces, fingerprints, cards, passwords) from/to particular terminals to control access of users. However, adding/deleting users within terminals isn’t the best way to control user access. These operations do not give a clear picture of user access control in the terminals. Therefore we suggest using Terminal User Control and User Access Code to control user access. Have a look at the below: |
| |
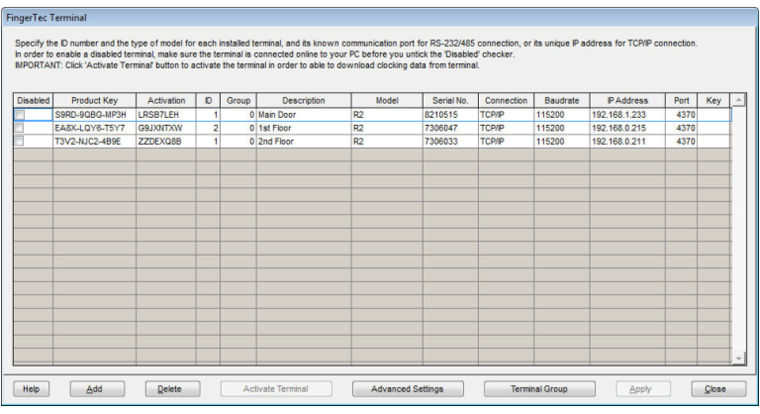
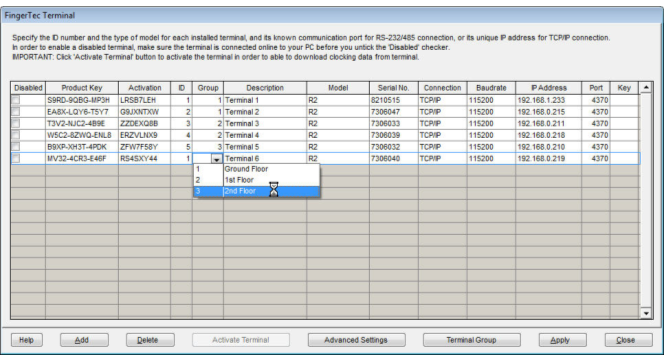
| In TCMS V2 screenshot above, there are 3 terminals and each are installed at each floor’s entrance for access control. |
 |
| |
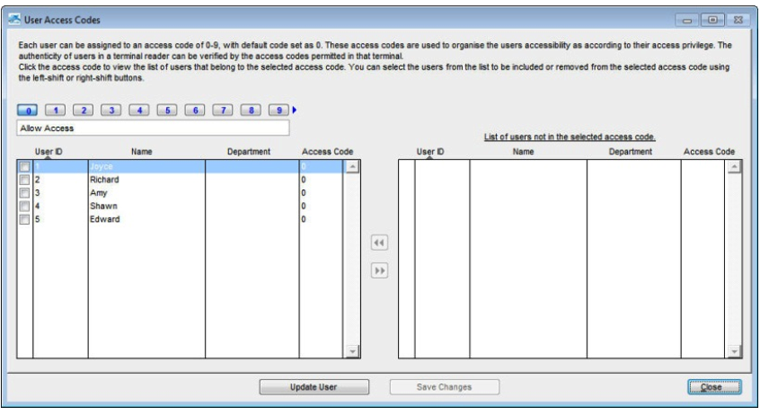
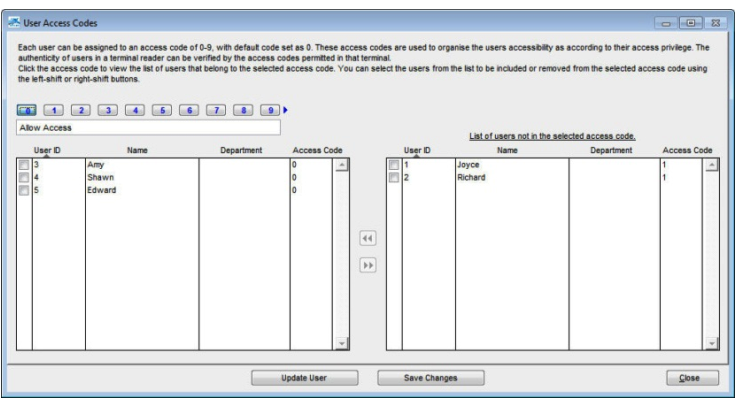
| Go to User Access Code and create 2 new codes: |
| Code 0 – Allow Access |
 |
| |
| Code 1 – No Access |
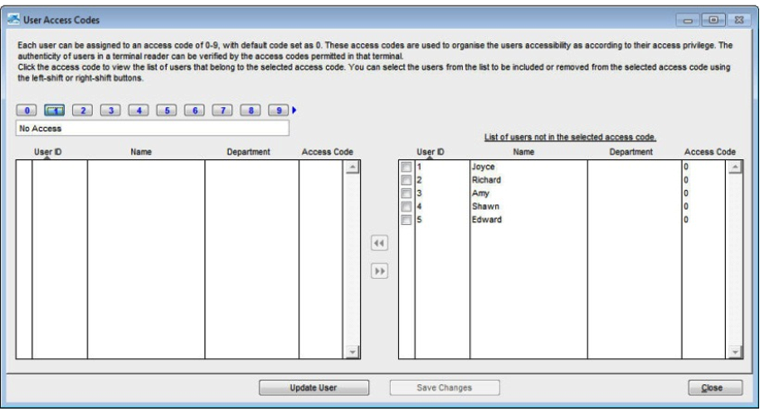 |
| It is recommended to use Code 0 to represent “Allow Access” because newly enrolled users are assigned to Access 0 automatically.
Whenever you click on either access code, the user ID and name assigned under the access code will appear in left column are while those appear in right column are not assigned under the code.
To move around users between the Access Codes: Select User > Press LEFT arrow (to include add the user into the Access Code) / RIGHT arrow (exclude the user from the access code) > Save changes
|
| |
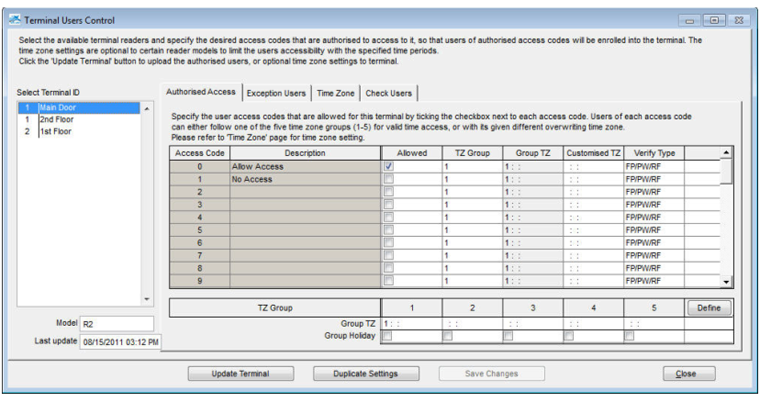
| Go to Terminal User Control > Authorize |
| For Access Code 0: Allow Access > Check the box labeled Allowed to enable access |
| For Access Code 1: No Access > Ignore the check box Allowed |
 |
| |
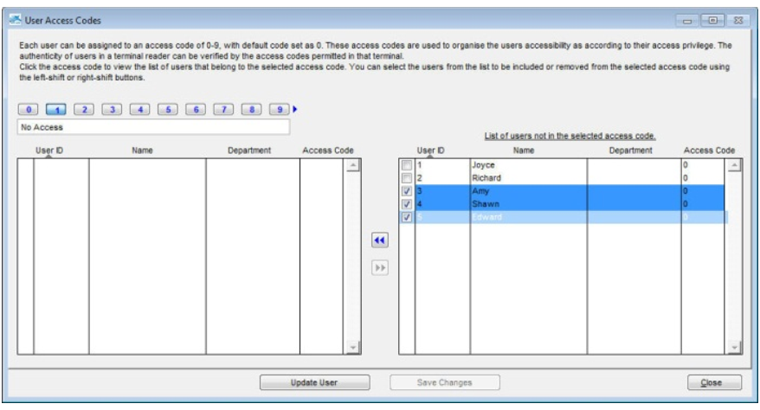
| Return to User Access Code to assign users into Access Code 0 and 1. For example, if you want to set users 3, 4 and 5 not to have access to Terminal 1 and 2, perform the following steps: |
| |
| Select Access Code 1: No Access Select user 3, 4 and 5 > Include them into Access Code 1 |
| Users 1 and 2 remain in Access Code 0: Allow Access. Next, you’ll want to upload users with Access Code 0: Allow Access to terminals 1 and 2. |
 |
| |
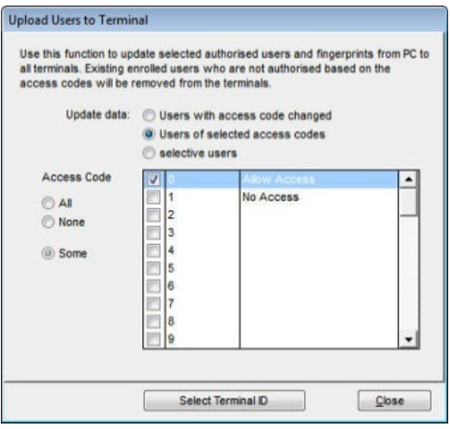
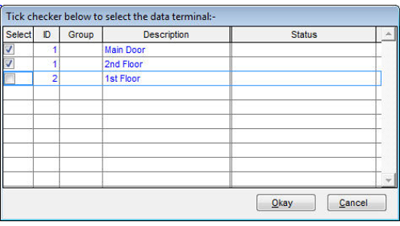
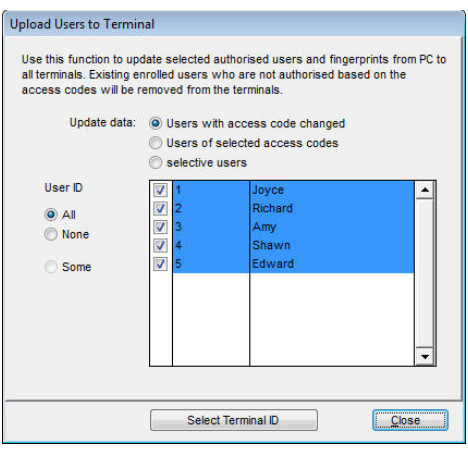
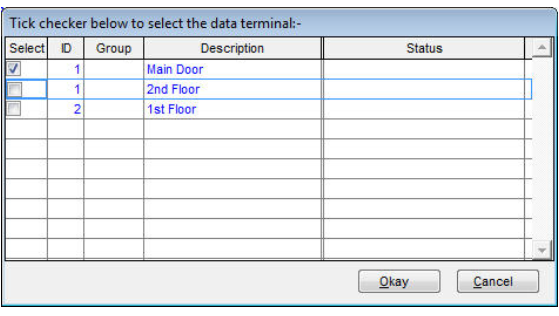
| Select Update User > Select “User of select access code 00 > Select Access Code 0: Allow access > Select Terminal ID > Select Terminal 1 and 2 to update settings > OK to proceed. |
 |
| |
| Now only user 1 and 2 can verify and gain access at Terminal 1 and 2, but not user 3, 4 and 5. Repeat the steps above to assign users into different terminals. |
 |
| |
| In the event that you want to change the user access at the terminal, an example would be users 1 and 2 are no longer allowed access to terminal 1 and 2. Instead, user 3, 4 and 5 are allowed to access terminal 1 and 2. |
 |
| |
| To change user 1 and 2 into Access Code 1: Press Access Code 1: No access > Select user 3, 4 and 5 > Exclude them from Access Code 1 > Select user 1 and 2 > Include them into Access Code 1 |
 |
| |
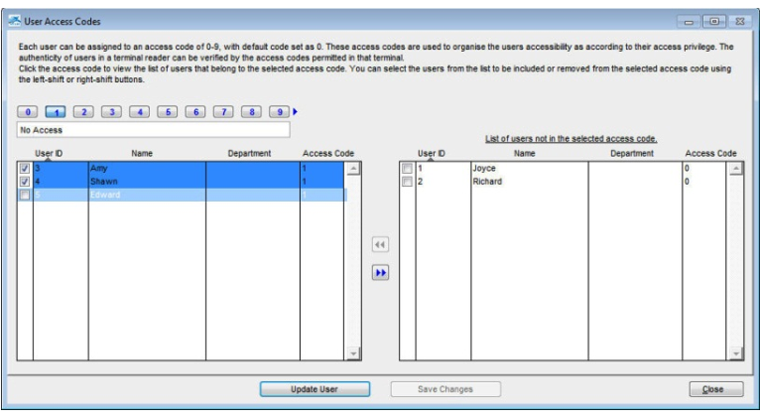
| To confirm the settings are correct, click on Access Code 0 to check. Users 3, 4 and 5 are displayed in left column, while users 1 and 2 are displayed in right column. |
 |
| |
| Next, you’ll need to update the settings into the terminal. Select Update User > Select the checkbox “User with access code changed” > Click Select Terminal ID > Select Terminals to update settings > OK to proceed. |
 |
| |
| The upload process will remove users 1 and 2 from terminal 1, and these users can no longer be verified at the terminal. At the same time, users 3, 4 and 5 are uploaded into the terminal and are allowed access. |
 |
| |
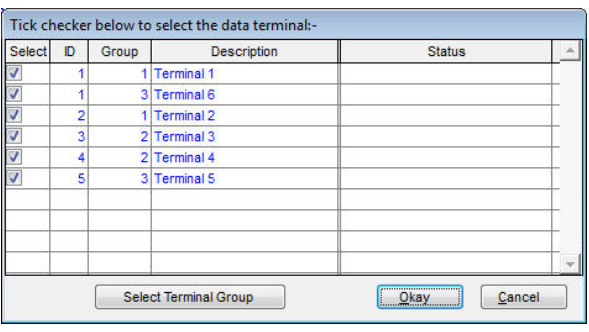
| If you find that you cannot remember which users are allowed access during the previous upload, you can choose to upload users with Access Code 0: Allow Access only. You will need to select the checkbox “Users of selected access code” > Access Code 0 (Allow Access) > Click Select terminal ID > Select terminals > OK to proceed. |
 |
| The software will then erase all users stored in the terminals, and only upload users assign with Access Code 0 (Allow Access) to it. |
| |
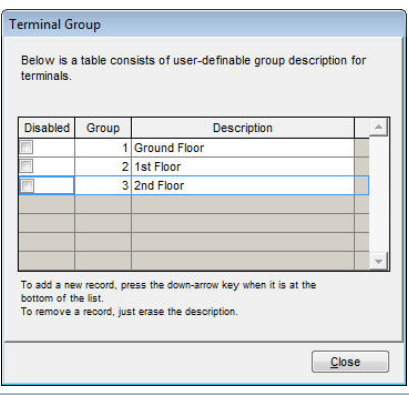
| In the event of a large scale installation, updating the Access Code for each terminal can be time consuming. Therefore we suggest you to assign terminals into groups before performing any upload. |
 |
| |
| In FingerTec Terminal page > Click Terminal Group |
 |
| |
| Create Terminal Group 1 (Ground floor), 2 (1st floor) and 3(2nd floor). |
 |
| |
| Assign the terminals according to their groups. |
 |
| |
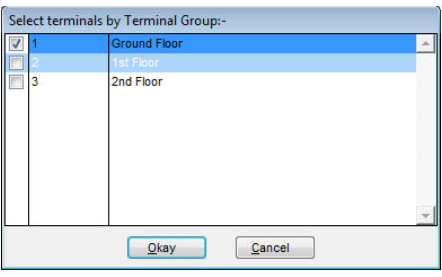
| During update process > Click Select Terminal Group > Select the Group to update settings > OK to proceed. |
 |