 |
| |
| Chapter 1 |
| Installation and Configuration |
| |
| This chapter guides you on the installation and basic setup of the Ingress. |
| |
| Before you start using Ingress, you will need to install the software successfully into your
computer. Installing the Ingress software is hassle-free as the Ingress installer contains an
installation wizard, to guide you step-by-step in setting up the software completely. |
| |
| GETTING STARTED |
| Ingress Installation |
| |
| System Requirements |
| Before installing Ingress, please make sure your client and server PCs are up to date with the
following requirements: |
| |
| Feature |
Server |
| Operating
system |
• Windows XP
• Windows Vista
• Windows 7, Windows 8
• Windows Server 2003/2008
• (32 or 64 bits) |
| Processor |
Intel® Core® 2 Duo 2.5 GHz or better |
| Memory |
3 GB of RAM or better |
| Hard drive |
80 GB |
| Resolution |
1024 x 768 or higher |
|
|
| Feature |
Client |
| Operating
system |
• Windows XP
• Windows Vista
• Windows 7
• Windows Server 2003/2008
• (32 or 64 bits) |
| Processor |
Intel® Core® 2 Duo 2.0 GHz or better |
| Memory |
2 GB of RAM of better |
| Hard drive |
50 GB |
| Resolution |
1366 x 768 |
|
|
| |
| Installing the System |
| For Ingress to function properly, you will need to install these components first: |
| |
| • MySQL Server |
| • Microsoft .NET Framework 4.0 Full |
| • FingerTec Ingress Software |
| • OFIS Scanner Driver |
| |
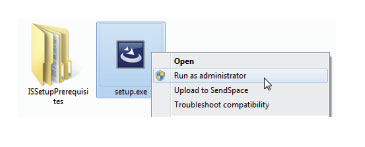
| Starting the Ingress Installation |
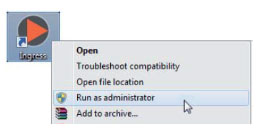
| Right click the FingerTec Ingress setup file and select Run as administrator. |
 |
| |
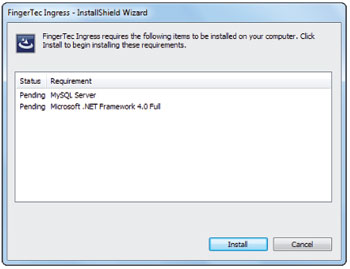
| This will prompt the installer to start the Ingress Server – Install Shield Wizard. The Install Shield
Wizard will show the required components’ installation status. There are 3 components to be
installed before we can proceed with Ingress installation. |
| |
•MySQL Server
•Microsoft .NET Framework 4.0 |
 |
| |
| Click Install to initiate the installation. |
|
| |
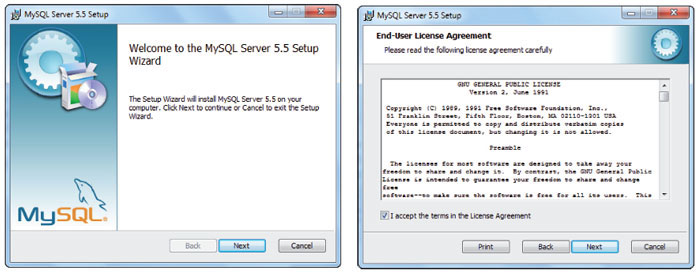
| Installing MySQL Server |
| The first component to be installed is the MySQL Server. |
| |
| At the welcome page, click Next to proceed. At the End-User License Agreement window, select
I accept the terms in the License Agreement and click Next to proceed. |
| |
 |
| |
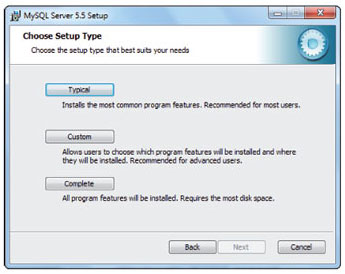
At the Choose Setup Type window,
choose Typical to proceed. |
|
 |
|
| |
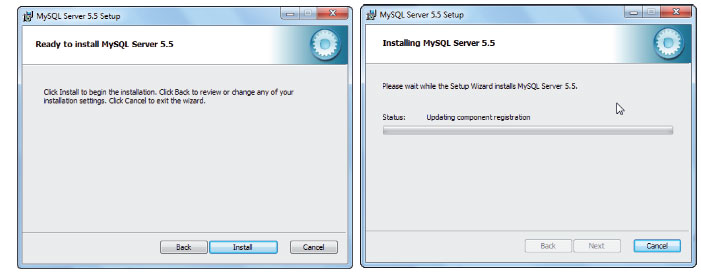
| At the Ready to install MySQL Server 5.5 window, click Install to immediately start the installation.
When the progress bar completes, you will be prompted with MySQL Enterprise window. |
| |
 |
| |
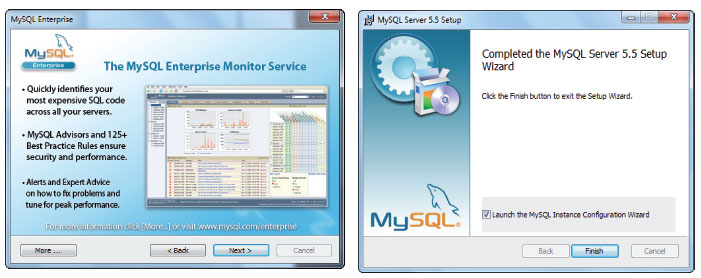
At the MySQL Enterprise window,
click Next> Next and Finish to launch the MySQL Instance
Server Configuration Wizard. |
|
 |
 |
|
| |
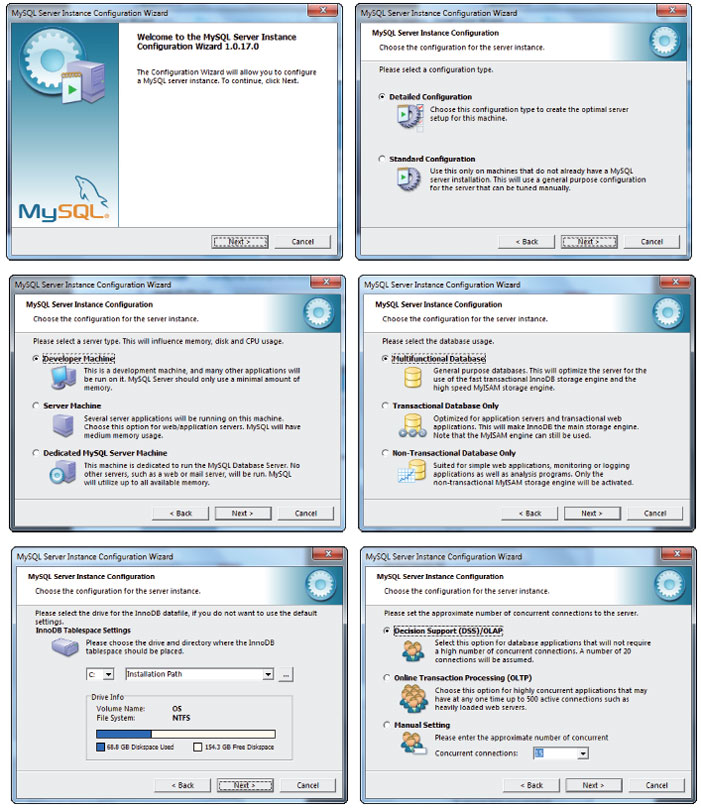
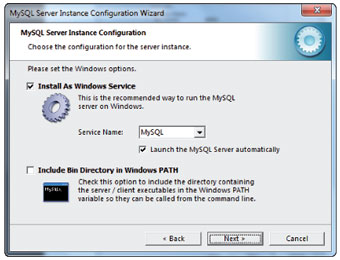
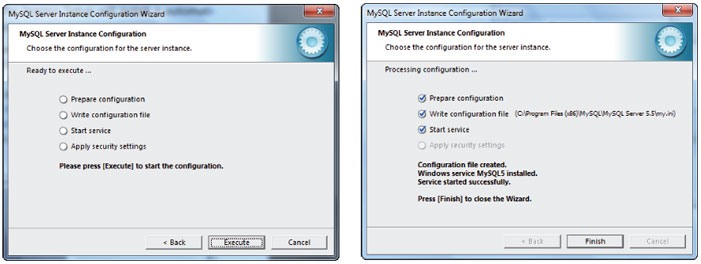
| Once the installation of MySQL Server completes, the program will launch the MySQL Server
Instance Configuration Wizard. You need to click Next 9 times until you reach the security
options window. Make sure that on each page before you clicked next, the selections are as
shown as the screenshots below. |
| |
 |
 |
| |
 |
| |
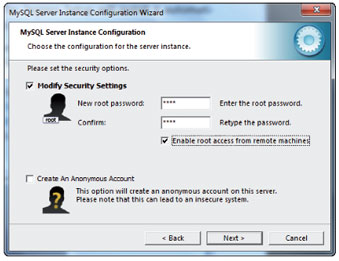
| |
At the Modify Security Settings, enter your
new Root Password and enter it once again
for reconfirmation. Click Next > Execute to
start the configuration. Once done, click
Finish. |
|
 |
| |
 |
|
| |
| Installing Microsoft .NET Framework 4.0 |
| The next component that the installer needs to install is the Microsoft .NET Framework 4.0. The
FingerTec Ingress Setup will detect and determine if the computer has already been installed
with the Microsoft .NET Framework 4.0. It will skip the installation if it has been installed. If it
has not been installed, the FingerTec Ingress Setup will install it automatically. |
| |
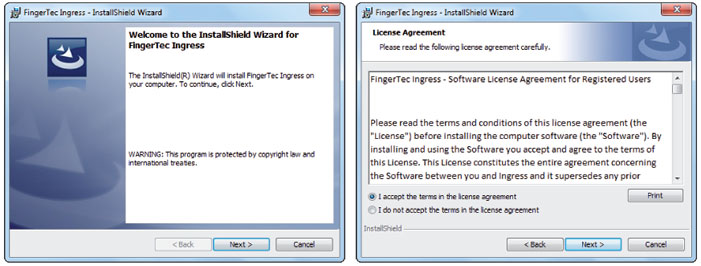
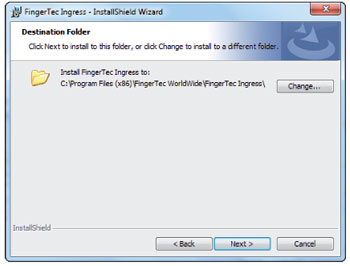
| Upon completing the installation of the MySQL Server and Microsoft .NET Framework 4.0, the
next component to be installed is the Ingress Server. Click Next, select I accept the terms in the
license agreement and click Next to proceed. Choose the installation path and click Next. |
| |
 |
| |
| |
Select Complete and click Next. Click Install to start the Installation and click Finish when the process is complete. |
|
 |
| |
 |
|
| |
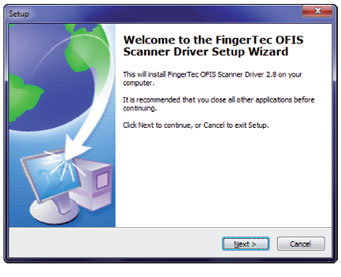
| Installing OFIS Scanner Driver |
| The last component to install is the OFIS Scanner Driver. The Ingress Setup will detect and determine
if the computer has already been installed with the OFIS Scanner Driver and skip the
installation if has. If it has not, the Ingress Setup will install it automatically. |
| |
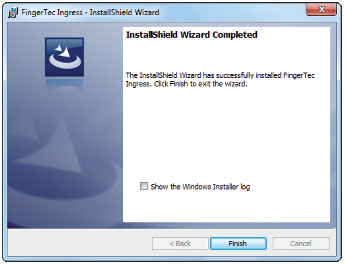
| |
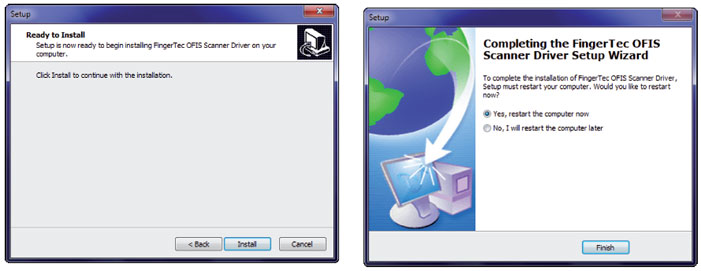
Click Next and click Install to start the installation.
Upon completing the installation,
you will need to restart the computer for
the changes to take effect. Please select No,
I will restart the computer later and click
Finish to proceed to the next step. |
|
 |
 |
|
| |
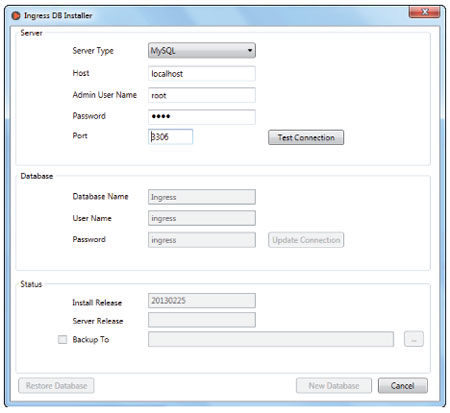
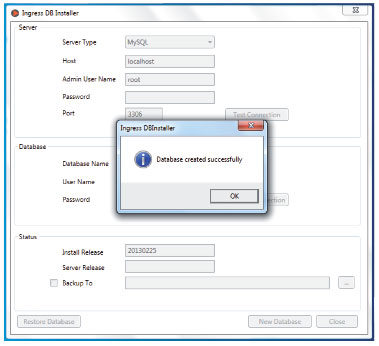
| Completing Ingress DB Installer |
| The Ingress Setup will then prompt the Ingress DB installer window. It is very important to test
the server and database connection before you start using Ingress. If you do not perform this
step, you will not be able to log into Ingress. Insert the Password and click Test Connection. |
| |
 |
| |
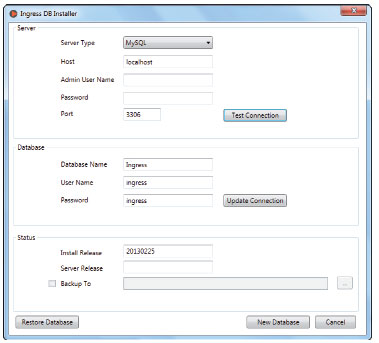
| Once the server connection is established, it
will open up the option for Database. Insert
the User Name and Password for the Database
and click Update Connection. |
 |
|
| |
| After the Database connection is established,
click New Database to create a new
database. |
 |
|
| |
| Click Finish to complete the installation. |
 |
|
| |
| Ingress Startup |
| Once the installation has completed, the
Ingress icon will be available at the desktop.
Right click the icon and select Run as
administrator. |
|
 |
|
| |
| The Ingress client will validate the database
connection from the server. Once the validation
has been obtained, insert the Server
IP Address and Server Port to establish connection.
Click Test to test the connection.
When the connection has been established
successfully, click Save to save the Server IP
Address and Server Port into the computer
for future references. |
| |
| Now you will reach the Ingress Login Window.
Insert the User Name and Password to
log into Ingress. Default User Name: admin
, Password: 123. You can change the User
Name and Password under Ingress User Accounts.
Click Login to log into Ingress. If you
wish to reconfigure the server settings, click
Server Setting. You can also log into Ingress
by using your fingerprint instead of the
username login. You will need to enroll your
fingerprint template(s) under User Account before you can login using this method. |
|
 |
|
| |
| Congratulations! Now you are about to experience INGRESS, the Advanced Access Control
Software, brought to you by FingerTec Worldwide. |
| |