| 1. |
Verification using fingerprint, card and password |
| |
| 1. |
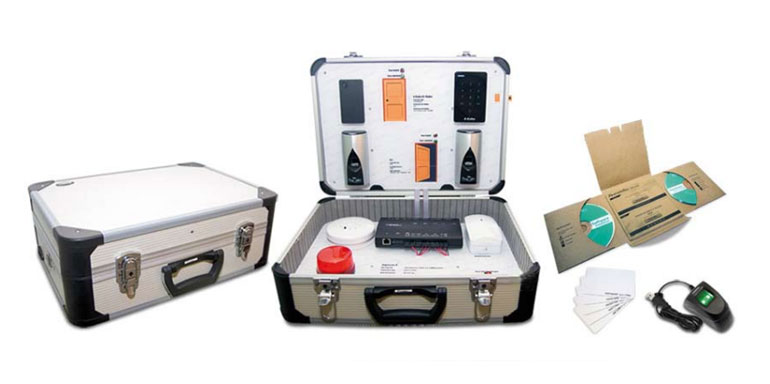
Verify enrolled fi�ngerprint at R2c. The Door Unlock LED will light up indicating
door open. |
| 2. |
Verify using password and card to unlock the door |
| 3. |
Verify invalid fi�ngerprints at R2c. The Door Locked LED will light up indicating
door will not open for invalid veri�cation. |
|
| |
|
| 2. |
Door access security using door sensor and alarm |
| |
| Amend the settings under Doors to demonstrate functions of each option. Refer to
Confi�guring settings to doors at Chapter 2 Management of Device and Door |
| |
|
| 1. |
Change the following and upload settings to Ingressus |
| |
| a. |
Lock Open Duration = 3s |
| b. |
Door sensor Type = NC |
| c. |
Door sensor delay = 1s |
|
| 2. |
Verify to unlock door, Door unlock LED will light up |
| 3. |
Switch door sensor to NO position to simulate door open |
| 4. |
Wait for 3s and Door Locked LED to light up |
| 5. |
Wait for 1s and Alarm shall be activated |
| 6. |
Switch door sensor to NC position to simulate door closing |
| 7. |
Alarm shall be de-activated |
| 8. |
Make sure Door Locked LED light up to simulate door close |
| 9. |
Switch door sensor to NO position to simulate door force open |
| 10. |
Alarm shall be activated immediately |
| 11. |
Switch door sensor to NC position to simulate door close |
| 12. |
Alarm shall be de-activated immediately |
|
| |
|
| 3. |
Antipassback |
| |
| Amend settings under Zone, which is available in Ingressus Only to demonstrate
Antipassback feature. Refer to Chapter 3 Setup of Zones under Section Antipassback for details. |
| |
|
| 1. |
Set the Antipassback between readers of Door 1 and readers of Door 2
respectively and upload it to Ingressus |
| 2. |
Verify at In device once followed by veri�cation at Out device once to simulate
normal in-out operation |
| 3. |
Verify at In device once to simulate clocking in scenario |
| 4. |
Verify at In device again to simulate clocking in again |
| 5. |
Door Unlocked LED will not light up to indicate that the door will not be
opened when you set Antipassback on. |
| 6. |
Verify once at the Out device then followed by once at the In device. Door
unlocked LED will light up to indicate door open. |
|
| |
|
| 4. |
Interlocking |
| |
| Amend settings under Zone, which is available in Ingressus Only to demonstrate
Interlocking feature. Refer to Chapter 3 Setup of Zones under Section Interlocking for details. |
| |
|
| 1. |
Activate the option and upload to Ingressus |
| 2. |
Verify at In device, the Door Unlocked LED will light up |
| 3. |
Switch door sensor to NO position to simulate door open |
| 4. |
Verify at Out device to simulate user is going to open the second door |
| 5. |
Door Locked LED will light up indicating that door remains close |
| 6. |
Switch door sensor to NC position to simulate door close |
| 7. |
Verify again at Out device and Door Unlocked LED will light up to indicate door
open |
|
| |
|
| 5. |
Fire alarm (smoke and heat sensor) |
| |
| Amend settings under Zone, which is available in Ingressus Only to demonstrate
Fire alarm feature. Refer to Chapter 3 Setup of Zones under Section Fire alarm for
details. |
| |
|
| 1. |
Set Auxiliary Input Shorted under Trigger Condition |
| 2. |
Set Auxiliary Input 1 under Input Point Address |
| 3. |
Check Lock 1 and Lock 2 |
| 4. |
Select Normal Open under Action Type |
| 5. |
Upload settings to Ingressus |
| 6. |
Press the test button of the smoke and heat sensor to simulate �fire or smoke
detected |
| 7. |
Door Unlocked LED of both doors will light up to indicate door open |
|
| |
|
| 6. |
Burglar alarm (motion detector) |
| |
| Amend settings under Zone, which is available in Ingressus Only to demonstrate
burglar alarm. Refer to Chapter 3 Setup of Zones under Section Fire alarm for details. |
| |
|
| 1. |
Set Auxiliary Input Disconnected under Trigger Condition |
| 2. |
Set Auxiliary Input 2 under Input Point Address |
| 3. |
Check Auxiliary 1 only |
| 4. |
Select Normal Open under Action Type |
| 5. |
Upload settings to Ingressus |
| 6. |
Wave in front of the motion detector to simulate movement |
| 7. |
Alarm should trigger immediately |
|


